The original Blue Goo is still the most archival of the photographic processes, and nothing could be easier or more versatile. Originally invented by our Main Man Sir John Herschel, deep thinker, tea drinker and dabbler botanist – who was looking for a way to make quick copies of all his science and astronomy notes back in 1842 – and invented the ‘blueprint’ to solve his quandary. It was Herschel’s friend Anna Atkins (who was also a good friend and student of Henry Fox Talbot) who first used cyanotype for photographic purposes, making exquisite photograms of seaweed and algae, which she bound and self-published into the world’s very first photographically illustrated book.
The process itself is very easy – it doesn’t require a darkroom or expensive equipment, or even a camera. The two-part solution is non-toxic and therefore suitable for children to experiment with. There are a number of different ways you can use cyanotype. We’ve written a little primer on each of the various applications. If you’d like some hands-on experience please do come along to one of our regular workshops in the process, we also sell an all-inclusive Cyanotype Kit in our web shop. For the processes that use paper we recommend Magnani Revere or Somerset Satin.
Making Cyanotype
Classic Cyanotype comes in a two-part solution. This is for practical reasons as once the two solutions are mixed together they have a very short shelf life, but in their separate solutions they will last for a year or more. It’s a very simple concoction to make, the recipe is as follows (or you can buy it pre-mixed from most photography shops, including our web store).
Solution A
400ml water (20°C)
100g ferric ammonium citrate green
add water to make a total of 500ml
Solution B
400ml water (20°C)
40g potassium ferricyanide
add water to make a total solution of 500ml
Coating paper with cyanotype
Mix equal parts of the solutions together in a clean glass or plastic vessel and let it ‘ripen’ for at least an hour in a dark location, or overnight if you wish. Using a hake brush (or a sponge or coating rod – suitable tools will not have any metal components) coat the paper evenly with the solution and allow to dry. Carry out these steps in very subdued lighting – you can use a hairdryer to speed things along. And that’s it! Your paper is now light sensitive and ready to be transformed via the application of some sunshine and your creativity.
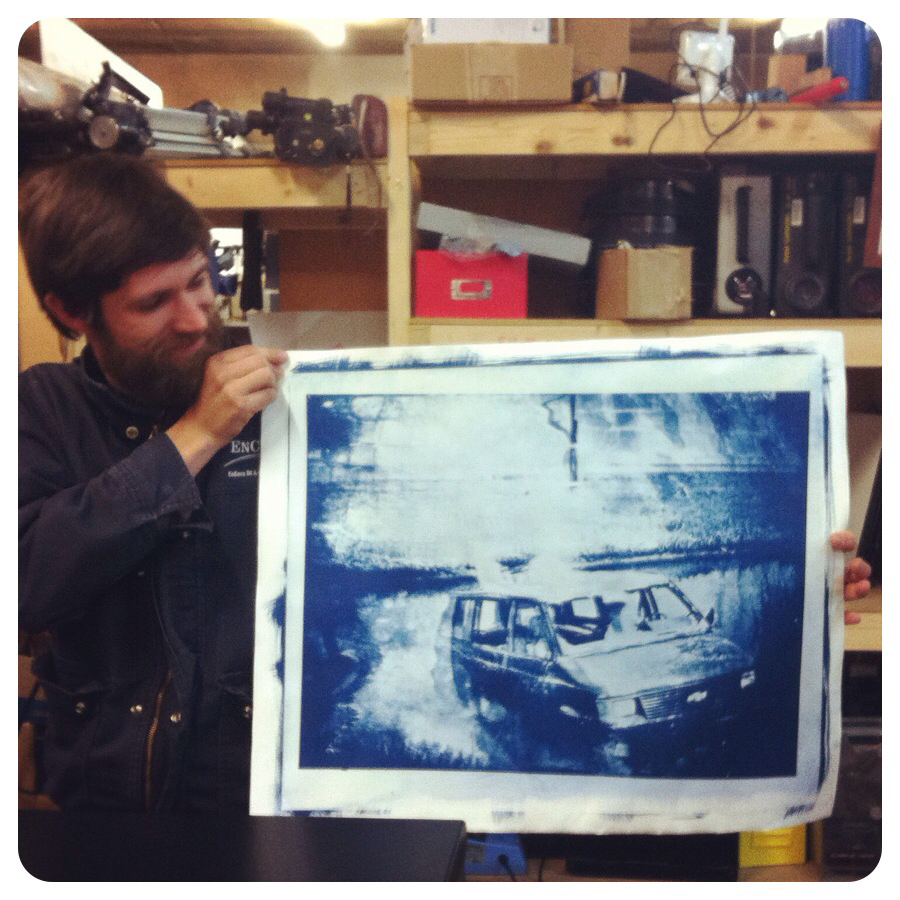
Cyanotype contact prints using photographic film

Contact printing involves sandwiching a negative with a piece of light sensitive material (in this instance your paper coated with cyanotype solution) so that they remain in constant contact for the entire exposure. You can purchase contacts frames made especially for this purpose, or you can use a piece of heavy plate glass if a contact frame is out of your reach. Make sure the glass doesn’t have a UV-blocking coating or you’ll have very frustrating results – perspex is not suitable for this same reason.
Local photographer James Tylor describes the ideal characteristics of a good negative to use for cyanotype as “If you can’t read a newspaper through it, then it will be good for cyanotype” and we abide by it. Overexposed shots work best. We often deliberately overexpose by two to three stops when shooting sheet film that we intend to make into cyanotype prints. While you’ve got the 4×5 out it’s not hard to make one perfect exposure, and another overexposed shot. All bases covered.
The technique is simple – coat your paper, place your negative on top, sandwich together with a contact frame or piece of glass, place it in the sun. How long for is the tricky part. Sunshine is not a constant and each negative will want a different exposure. Contact frames can be really helpful in this instance as they have a split back, allowing you to peel back the paper from the negative and see how the exposure is doing without moving the registration of the negative on the paper, so you can pop it back into the sunshine if it’s not ‘cooked’ yet. Unexposed areas will remain green, while exposed areas will be blue through grey depending on how much UV light has reached the paper.
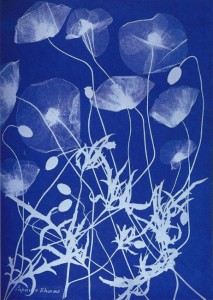
Cyanotype photograms on paper
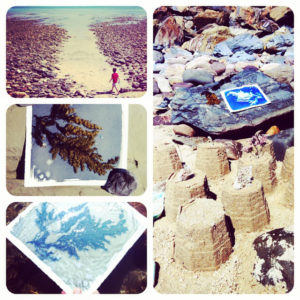
Absolutely the easiest way to play with this light sensitive process anywhere you like! A photogram is made by placing objects directly on light-sensitive paper and exposing it to the sun. You can try this with or without a contact frame. We’ve even done it at the beach!
This technique is exceptionally versatile, limited only by your imagination. Objects don’t have to be flat to make a good photogram – just think of Anna Atkins’ seaweed prints – you can use toys, cutouts, flowers, rocks, jewellery – just about anything that will lie still in the sun. I’ve also had some success cutting shapes out of fabric interfacing to make translucent jellyfish for little underwater scenes. US artist Christian Marclay used old cassette tapes to make some incredible large photograms.
Cyanotype photograms on fabric
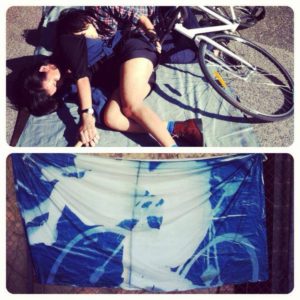
We experimented with this process while working on our installation for Moving Music 2014. It was so much fun we soon had our entire studio cohort involved in what must have looked like some form of bizarre car park performance art to the uninitiated.
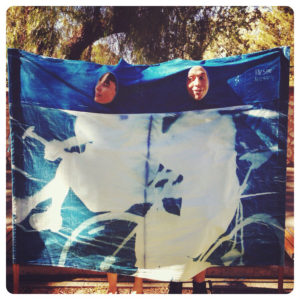
We soaked old hotel sheets in cyanotype mixture and hung it up in the darkroom to dry overnight. It’s important to use a 100% natural fibre cloth as synthetics won’t absorb the solution. The Australian sun has a fairly brutal UV content, so it doesn’t take long for the cyanotype to expose in the sunshine. On really hot days we had to use counter-measures to conquer this problem – we rolled our cyanotype-impregnated sheets in thick blankets so that when we unrolled them outside the blanket would be on top of the sheet, preventing exposure. We then had one of our accomplices crawl under the blanket and strike a pose, before whipping the blanket off. When the sheet was exposed we trotted into the darkroom and gave the sheet a good dunk and swirl about in the sink, rinsing out all the unexposed cyanotype to reveal white areas. We then hung the sheet up outside to dry. For one of our experiments we failed to take into account the angle of the sun, which meant that the heads of our subjects we cut off! Fortunately we found a fun and creative way to solve the problem, as it was just too good to waste.
You might also be interested in checking out this completely inspiring video of an American College class making a giant cyanotype, or in contemporary artist H. Lisa Solon‘s beautiful botanical prints on fabric.
Cyanotype contact prints with digital negatives
Theres a whole corner of the internet devoted to the art and science of making digital negatives – negatives made by printing onto specially coated transparent film with your inkjet printer. We don’t do anything on that level of digital fancy in these parts (mostly because we can’t afford the printer. One Day…) However that doesn’t seem to be a large concern for cyanotype as we’ve had some excellent success using our laser printer and transparency film meant for overhead projectors. We deliberately chose images that weren’t heavily detail-dependent and that does seem to help a great deal. If you want to achieve really white areas in your print you may need to print on the same piece of transparency twice to get a good thick layer of black on your negative.
Once you’ve made your digital negative the process is exactly the same as for film negatives – make your paper and film sandwich and stick it in the sun.
Drawing onto transparency
Take one of the transparency sheets and draw on it using a paint or chalk pen. Use this drawing in the same way as a negative to make multiples. This can work really well for party invitations.
Developing the cyanotype image
All you need to do is soak your paper or fabric in water. Seriously, water will wash away the unexposed areas and begin the chemical process to turn the exposed areas from flat grey into a nice deep blue. If you are working with paper – float the paper image side down in a sink or dish full of water and leave it for a while. The unexposed areas will gently wash away. If your image has purple or green areas after washing, let it lie in the wash bath a little longer, the purple will wash away after a while. We have discovered that Adelaide tap water has a high concentration of chlorine which will change your blue image into a strange olivey-yellow if left soaking for too long. You can choose to use drinking water or just keep a really close eye on your work. Once the washing is done hang it up to dry – the blue will deepen as the paper dries.
If it’s fabric that you are using the developing process is much less delicate. Stick it in a tub or bucket of cold water and swirl it about. Depending on the size of your fabric it may need several changes of water until the water is clear. Hang it up to dry, step back and admire your work.
[…] You can read more about the cyanotype process in one of our earlier blog posts here. […]